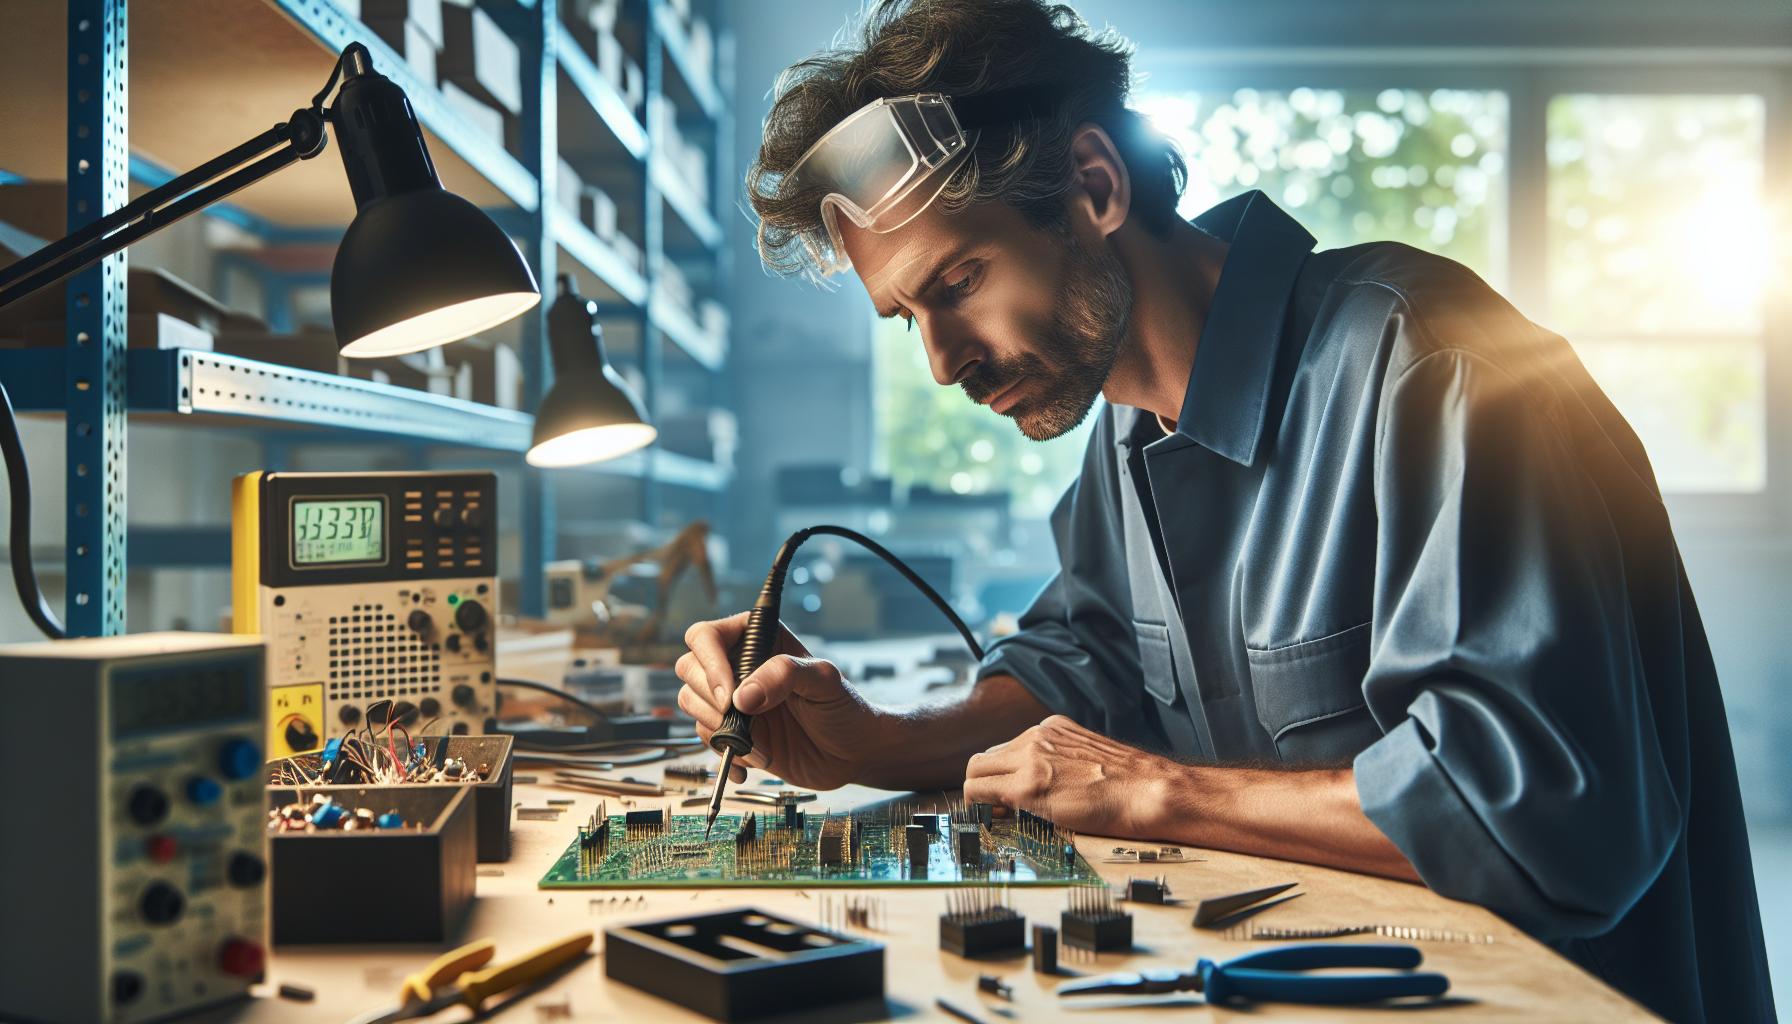
Blog

Wood Fired Pizza Ovens Melbourne: How To Make An Authentic Pizza Oven?

There’s something magical about the aroma and taste of a pizza cooked in a wood-fired oven. The smoky flavours, crispy crusts, and perfectly melted cheese create an unforgettable experience. If you’re a pizza lover in Melbourne, why not take your passion to the next level and create your very own authentic wood-fired pizza oven? In this guide, we will walk you through the steps of making a pizza oven that will transport you to the heart of Italy without leaving your backyard. Get ready to unlock the secrets of wood-fired cooking and indulge in the world of flavours with your very own Wood Fired Pizza Ovens Melbourne.

Key Takeaways:

  • Wood-fired pizza ovens offer superior flavour, high cooking temperatures, versatility, and create a welcoming outdoor entertaining space.
  • Before building your pizza oven, carefully plan the location and select the size and style that suits your needs.
  • Gather essential materials such as refractory bricks, fire-resistant mortar, insulation materials, a stainless steel chimney, and necessary tools like trowels and a spirit level.
  • Follow the construction process, including building the foundation, creating the base and walls, constructing the dome, and adding insulation and finishing touches.
  • Properly curing the oven is crucial before its first use. Gradually increase the temperature over several days to allow the materials to settle and strengthen.

Wood Fired Pizza Ovens Melbourne

Why Choose Wood Fired Pizza Ovens?

  • Superior Flavour: Wood-fired ovens impart a unique smoky flavour to pizzas, resulting in a more authentic and delicious taste.
  • High Cooking Temperature: These ovens can reach extremely high temperatures, allowing for quick and evenly cooked pizzas with perfectly crispy crusts.
  • Versatility: Apart from pizzas, wood-fired ovens can be used to cook a wide range of dishes, including bread, roasted meats, vegetables, and even desserts.
  • Outdoor Entertaining: Wood-fired ovens create a focal point in your outdoor space, providing a cosy and inviting atmosphere for gatherings with family and friends.

Planning and Design

Before embarking on your pizza oven journey, careful planning and design considerations are crucial.

  • Determine the Location: Choose a suitable spot in your outdoor area, ensuring proper ventilation and safe distances from flammable objects.
  • Select the Size and Style: Decide on the size of your oven based on the available space and your cooking needs. Consider whether you prefer a traditional or modern design.

Gathering Materials and Tools

To bring your pizza oven to life, gather the necessary materials and tools.

  • Essential Materials: Refractory bricks, fire-resistant mortar, concrete, insulation materials (such as ceramic blanket or vermiculite), stainless steel chimney, and a door.
  • Tools Needed: Trowels, shovel, spirit level, masonry saw or angle grinder, measuring tape, and safety equipment (gloves, goggles, mask).

Construction Process

Follow these steps to construct your authentic wood-fired pizza oven:

  • Building the Foundation: Create a solid foundation using concrete and ensure it is level and stable.
  • Creating the Base and Walls: Lay the refractory bricks in a circular pattern using fire-resistant mortar to create the base and walls of the oven.
  • Constructing the Dome: Gradually build the dome by layering and overlapping the bricks until reaching the desired height.
  • Insulating and Finishing Touches: Apply a layer of insulation material, such as a ceramic blanket or vermiculite, over the dome. Install a stainless steel chimney and a door to retain heat and control airflow.

Curing the Oven

Before firing up your pizza oven for the first time, it’s crucial to cure it properly. This process involves gradually increasing the temperature over several days to allow the materials to settle and strengthen. Consult a professional or reliable resources for detailed instructions on the curing process.  For more information please visit https://www.alburycity.nsw.gov.au/leisure/parks-and-public-spaces/wood-fired-oven today to learn more!

Frequently Asked Questions (FAQ)

How long does it take to build a wood-fired pizza oven?

The time required to build a wood-fired pizza oven can vary depending on factors such as the size of the oven, your level of experience, and the construction method you choose. On average, it can take anywhere from a few days to a couple of weeks to complete the construction process. It’s important to allocate enough time for planning, gathering materials, and allowing for curing periods before you can start cooking delicious pizzas.

Can I use regular bricks for the oven?

Regular bricks are not recommended for building the cooking chamber of a wood-fired pizza oven. Due to the high temperatures reached inside the oven, regular bricks can crack and deteriorate over time. It is essential to use refractory bricks or fire bricks that are specifically designed to withstand the extreme heat. Refractory bricks have excellent thermal properties and can handle the rapid temperature changes experienced in a wood-fired oven.

How much wood should I use for cooking in a wood-fired oven?

The amount of wood required for cooking in a wood-fired oven can vary depending on factors such as the size of the oven, the desired cooking temperature, and the duration of cooking. As a general guideline, you will typically need a moderate-sized bundle of hardwood logs, such as oak or hickory, for a typical pizza cooking session. It’s important to monitor the fire and adjust the amount of wood as needed to maintain the desired cooking temperature.

How do I maintain and clean my pizza oven?

Proper maintenance and cleaning are essential to ensure the longevity and optimal performance of your wood-fired pizza oven. Here are some tips:

  • Regularly remove ashes and debris from the oven floor using a brush or shovel.
  • Clean the interior walls of the oven by brushing off any loose debris or ash buildup.
  • Avoid using water or cleaning chemicals inside the oven, as they can damage the materials and affect the oven’s performance.
  • Periodically check the chimney and flue for any blockages and ensure proper airflow.
  • Inspect the oven for any cracks or damage, and repair them promptly to prevent further deterioration.
  • Cover the oven when not in use to protect it from the elements.

By following these maintenance practices, you can keep your pizza oven in great shape, ready to create culinary masterpieces for years to come.

Conclusion

Congratulations! You have successfully embarked on the journey of creating an authentic wood-fired pizza oven. With your Wood Fired Pizza Ovens Melbourne, you can now unleash your culinary creativity and experience the unmatched flavours of wood-fired cooking. Gather your loved ones, fire up the oven, and indulge in the art of making pizzas that are sure to leave a lasting impression. Cheers to the joy of wood-fired cuisine and memorable moments shared around the table!

Sapphic flag pride: What flowers are on the sapphic flag?

The sapphic flag consists of the colours pink, white, and lavender. The flowers on the sapphic flag are the daffodil, the forget-me-not, and the rose. The daffodil is associated with love and remembrance, the forget-me-not with love and hope, and the rose with love and beauty.

Key Takeaway:

  • The sapphic flag is a symbol of pride for the LGBTQ+ community.
  • It consists of the colours pink, white, and lavender.
  • The flowers on the flag are the daffodil, the forget-me-not, and the rose.
  • These flowers are all symbols of love and affection.
  • The sapphic flag represents pride in Sapphic love.
  • It is often associated with lavender, daisy, and lily.
  • These flowers are commonly associated with the Sapphic goddess.
  • The term “sapphic” is often used as a shorthand for lesbian or queer female experiences.

sapphic flag pride

Definition of Sapphic Flag

The sapphic flag is a flag that consists of a red field with a white triangle in the centre. The triangle is symbolic of the female reproductive organs, and the red field represents the passion and love between two people of the same gender. The flowers that are on the sapphic flag are roses, which are known for their romantic and passionate qualities.

The Flowers on the Sapphic Flag

The sapphic flag is a symbol of pride for lesbian, gay, bisexual, and transgender (LGBT) people. The flag features a pink triangle and a blue square, both of which are symbols of the LGBT community. The flowers on the flag are unknown, but they may be symbols of love and peace.

  • Lavender

The sapphic flag consists of the colours purple, blue, and white. Purple represents the power and strength of the sapphic goddess, blue represents the sky, and white represents the purity of the sapphic goddess. Some flowers that are associated with the sapphic goddess are lavender, daisy, and lily.

  • White

The sapphic flag consists of the colours black and red, which are traditionally associated with love and passion. The flowers on the flag are the lily and the rose, both of which are symbols of love and romance.

  • Dark Pink

The sapphic flag consists of the colours pink and blue, which are traditionally associated with the LGBTQ+ community. Some flowers that are commonly associated with the sapphic flag are daffodils, lilies, and roses.

The Significance of the Flowers

The flowers on the sapphic flag represent pride in Sapphic love. The flag consists of a blue field with a white border, and a red triangle at the centre. The triangle is made up of three blue flowers, representing the sky, the water, and the earth. The flowers are symbolic of the threefold nature of Sapphic love.

Lavender

The sapphic flag consists of the colours purple and pink. Some flowers that are commonly associated with the sapphic flag are lavender and daffodil. The lavender flower is thought to be associated with the goddess Venus, who is known as the goddess of love and beauty. The daffodil is also associated with love and is said to be a symbol of hope.

White

The sapphic flag consists of the colours black and red, which are traditionally associated with the lesbian, gay, bisexual, and transgender (LGBT) community. Some flowers that are commonly associated with the LGBT community and are also featured on the sapphic flag include the daffodil, the lily, and the rose.

Dark Pink

The sapphic flag consists of the colours pink and blue, which are traditionally associated with the lesbian, gay, bisexual, and transgender (LGBT) community. Some flowers that are commonly associated with the sapphic flag are daffodils, lilies, and roses.

The sapphic flag consists of the colours black, red, and green, which are traditionally associated with the LGBTQ+ community. Some flowers that are typically associated with the sapphic flag are lavender, lilies, and roses. Lavender is thought to be a sacred flower to the LGBTQ+ community and is often used in ceremonies and rituals. Lilies are also seen as a symbol of love and purity, and are often given as gifts to couples who are getting married. Roses are often seen as a symbol of love and romance and are often given as gifts to newly-weds.

Frequently Asked Question

What is the origin of the word sapphic?

The word “sapphic” is derived from the name of the Greek poet Sappho, who lived on the island of Lesbos in the 6th century BCE. Sappho was known for writing love poetry addressed to other women, and her name has since become associated with same-sex love and desire between women.

What is a sapphic book?

A “sapphic book” is a book that features lesbian or queer female characters or explores themes of same-sex love or desire between women. The term “sapphic” is often used as a shorthand for lesbian or queer female experiences.

What is a sapphic wiki?

“Sapphic wiki” likely refers to a wiki or online encyclopedia focused on topics related to lesbian or queer female experiences, history, culture, and activism. The term “sapphic” is often used as a descriptor for content that focuses on women-loving-women relationships.

What is the opposite of sapphic?

The opposite of sapphic would depend on the context in which the term is being used. If “sapphic” is being used to describe same-sex love or desire between women, the opposite could be “heterosexual” or “straight.” However, if “sapphic” is being used to describe something that is specifically focused on women-loving-women experiences, the opposite could be “androcentric” or “male-centric.”

What is sapphic in English?

In English, “sapphic” is an adjective used to describe things related to same-sex love or desire between women. It can also be used to describe works of literature, art, or other cultural productions that feature or explore these themes. Additionally, “sapphic” can be used as a noun to refer to a lesbian or queer female person.

Summary of the Meaning of the Sapphic Flag

The sapphic flag is a symbol of pride for lesbian, gay, bisexual, and transgender (LGBT) communities. The flag consists of three horizontal stripes, each representing a different LGBT identity: pink for women, blue for men, and purple for non-binary people. The colours are based on the colours of the rainbow flag, which is a symbol of diversity and inclusiveness. The sapphic flag was created in 1990 and first flown at a pride parade in San Francisco.

Encouragement to Celebrate Sapphic Flag Pride

Celebrate Sapphic Flag Pride! The sapphic flag features the colours blue, pink, and white, which are traditionally associated with the LGBTQ+ community. The flowers on the flag are lavender and rose, which are also associated with the LGBTQ+ community. Lavender is known for its calming and relaxing properties, while rose is known for its romantic and passionate qualities. Together, these flowers represent the diversity and richness of the LGBTQ+ community. Let’s all join in celebrating sapphic flag pride and show our support for the LGBTQ+ community!

Conclusion

The Sapphic flag is an important symbol of LGBTQ+ pride and acceptance, representing different aspects of love and strength. The flowers on the Sapphic flag add an extra layer of meaning, symbolizing the beauty and diversity of the community. The Sapphic flag serves as a reminder that love is love, regardless of gender, and that everyone deserves to be accepted and loved for who they are.

The Evolution of the Japanese Flag

The Japanese flag, known as the “Nisshōki” or “Hinomaru” in Japanese, is one of the most recognizable symbols of Japan. The flag features a red circle, representing the sun, on a white background. The origins of the Japanese flag can be traced back to ancient Japan, where it has gone through several changes over the centuries. In this article, we will explore the evolution of the high quality Japan flag and how it has become a significant symbol of the country.

The Origins of the Japanese Flag

The earliest known Japanese flag was used during the reign of Emperor Go-Reizei in the 11th century. The flag was called the “Tensonkorin” and featured a sun and a crescent moon. However, it was not until the 16th century that the Hinomaru design became popular.

During the Sengoku period in Japan, warlords began using the Hinomaru flag. It was believed to bring good luck and was used to identify the armies of various warlords. The white color of the flag represented purity, while the red circle represented the sun, a symbol of power and divine status in Japanese culture.

japan flag

The Hinomaru Flag

The Hinomaru flag, which means “circle of the sun,” is a simple yet powerful design that has become synonymous with Japan. Its use can be traced back to the Edo period, when it was flown on the ships of the Tokugawa shogunate.

In 1854, Japan was forced to open its ports to foreign trade by the United States. This event, known as the “Opening of Japan,” led to a period of rapid modernization and westernization in Japan. As part of this process, the Japanese government began to use the Hinomaru flag as a symbol of national identity.

The Use of the Japanese Flag

The Hinomaru flag was officially adopted as the national flag of Japan in 1870, following the Meiji Restoration. However, it was not until 1999 that the flag was officially recognized by law as the national flag of Japan. Today, the flag is used in various ways, including during national holidays, on public buildings, and on the uniforms of the Japanese Self-Defense Forces.

However, the flag has also been the subject of controversy in recent years. Some people argue that the flag is a symbol of Japan’s militaristic past and should be replaced with a new design. Others argue that the flag should be changed to reflect Japan’s modern, multicultural society.

Variations of the Japanese Flag

Over the years, there have been several variations of the Hinomaru flag. One of the most notable variations is the “Rising Sun” flag, which features rays emanating from the red circle. This flag was used during World War II by the Imperial Japanese Army and is still used by some Japanese nationalist groups today.

Another variation of the flag is the “Sunburst” flag, which features 16 rays emanating from the red circle. This flag was used during the Taisho period in Japan and is still used by the Japan Maritime Self-Defense Force today.

The Future of the Japanese Flag

As Japan continues to evolve, so too may the Hinomaru flag. While some people advocate for a new flag design, others believe that the Hinomaru flag should remain a symbol of Japan’s culture and history. Ultimately, the future of the Japanese flag will depend on the opinions and preferences of the Japanese people.

Conclusion

The Japanese flag has a long and complex history, dating back to ancient times. While it has undergone many changes over the centuries, the Hinomaru design has remained a powerful symbol of Japan’s culture and identity. As Japan continues to modernize and evolve, the future of the flag may be uncertain, but its significance will continue to be felt for generations to come.

The Hinomaru flag has been a symbol of national pride and identity for Japan. It has been used to represent the country during significant events such as the Olympics, and is displayed proudly on public buildings and other important locations. However, its symbolism has been the subject of controversy.

Some people believe that the Hinomaru flag represents Japan’s militaristic past and should be replaced with a new design that reflects the country’s modern and multicultural society. Others believe that changing the flag would be an affront to Japanese culture and history.

In recent years, there have been calls to change the flag due to its use by far-right nationalist groups. However, the Japanese government has been reluctant to do so, citing the flag’s long history and cultural significance.

Despite the controversy, the Hinomaru flag remains an important symbol of Japan’s culture and identity. It represents the country’s rich history, traditions, and values, and will continue to be an important part of Japanese life for many years to come.

FAQs

What does the Hinomaru flag symbolize?

The Hinomaru flag features a red circle representing the sun, which is a symbol of power and divine status in Japanese culture. The white background symbolizes purity.

When was the Hinomaru flag officially adopted as the national flag of Japan?

The Hinomaru flag was officially adopted as the national flag of Japan in 1870, following the Meiji Restoration.

What is the controversy surrounding the Japanese flag?

Some people argue that the flag is a symbol of Japan’s militaristic past and should be replaced with a new design. Others argue that the flag should be changed to reflect Japan’s modern, multicultural society.

What is the Rising Sun flag?

The Rising Sun flag is a variation of the Hinomaru flag that features rays emanating from the red circle. It was used during World War II by the Imperial Japanese Army and is still used by some Japanese nationalist groups today.

Will the Japanese flag change in the future?

The future of the Japanese flag is uncertain, as it will depend on the opinions and preferences of the Japanese people. Some advocate for a new flag design, while others believe that the Hinomaru flag should remain a symbol of Japan’s culture and history.

How To Get Affordable, Quality Dentures In Perth

If you’re looking for affordable, quality dentures in Perth, there are a few things you can do. First, check with your insurance company to see if they cover dentures. If they do, they may have a list of dentists in Perth WA that they recommend. You can also ask your family and friends if they have any recommendations.

Once you’ve compiled a list of potential dentists, call around and ask about their prices. Be sure to ask about any discounts they may offer, as well. Once you’ve found a few dentists that you’re comfortable with, schedule a consultation. This will give you a chance to meet the dentist and discuss your options.

If you’re looking for affordable, quality dentures, Perth is a great place to start your search. By following these tips, you can be sure to find the perfect dentist for your needs.

How To Get Affordable, Quality Dentures In Perth

The Benefits Of Dentures In Perth

If you are considering dentures in Perth, there are many benefits that you should be aware of. Dentures can improve your appearance and your overall oral health. They can also help you eat and speak more effectively.

Dentures are custom-made to fit your mouth and can be made to look natural. They are made from either porcelain or acrylic and are designed to look like your natural teeth. Dentures can be used to replace all of your teeth or just some of them.

If you are missing some teeth, dentures can help improve your appearance by filling in the gaps. They can also help improve your oral health by preventing gum disease and tooth decay. Dentures can also help you eat and speak more effectively.

If you are considering dentures, be sure to talk to your dentist about the benefits and the risks. Dentures are a great option for many people, but they are not right for everyone.

The Process Of Getting Dentures In Perth

When it comes to dental care, one of the most common procedures is getting dentures. Usually, dentures are custom-made to fit an individual’s mouth and facial features. A few steps must be followed before getting dentures in Perth.

  1. Consult with a Dentist – Before starting the process of getting dentures, it is important to consult with a dentist. They will be able to help you choose the correct type of denture and assess any dental problems that may need to be corrected.
  2. Get a Prescription from Your Dentist – Now that you know what kind of denture you need, you must get a prescription from your dentist. This prescription will tell the prosthetic manufacturer exactly what type of denture you need and how much it should cost.
  3. Pick a Prosthetic Manufacturer – Now that you have your prescription and know which type of denture you need, it’s time to pick a prosthetic manufacturer. There are many prosthetic manufacturers in Perth, so it is important to do your research and find one that best fits your needs.
  4. Get Dentures Fitters in Perth to Fit the Dentures

The Cost Of Dentures

The cost of dentures can be very expensive. They can range in price from a few hundred dollars to a few thousand dollars. The cost will depend on the type of dentures you need and the materials that are used.

Types Of Dentures

Dentures come in many different types, so it’s important to choose the right type for your needs. There are several different types of dentures, and each has its own advantages and disadvantages. Here are the four most common types of dentures:

  1. Complete dentures: These are usually the most comfortable type of denture because they cover all of your teeth. They’re also the most durable type of denture, which is why they’re usually the first type of denture that people decide to use.
  2. Partial dentures: Partial dentures cover only some of your teeth. They’re usually less comfortable than full dentures because they don’t fit as well. And they can be more difficult to keep clean, since they don’t cover all of your teeth.
  3. Denture bridges: Denture bridges are a middle ground between full and partial dentures. They cover only some of your teeth, but they’re more comfortable than partial dentures and easier to keep clean.
  4. Dentures with braces: If you need dental implants or other dental procedures that require special braces, you may be wondering if you can get dentures with braces. 

The Maintenance Of Dentures In Perth

Perth dentists offer maintenance dentures services to those who have lost teeth and wish to keep their smile looking good. This service is usually recommended for those who are experiencing difficulty chewing or swallowing. The dentist will determine the type of denture that is most appropriate for the individual and will make regular visits to check it is functioning properly.

FAQs

Which dentures are most affordable?

The dentures that are the most affordable are the porcelain enamel retainers.

How much do dentures cost in Western Australia?

Dentures in Western Australia can be expensive, depending on the type of denture and where it is purchased. There are a variety of types and sizes of dentures, so prices will vary.

How do I decide what dentures to get?

Dentures must fit well and properly to provide comfortable wear and avoid the need for adjustment. Dentists can laser-cut custom dentures that are custom fitted to your teeth, mouth, and gums. Most dentures come in sets of two or more artificial teeth which are worn on either side of the natural teeth.

How can I save money on dentures?

There are a few ways to save money on dentures: by choosing the right type, by finding a good provider, and by taking care of them.

Are there any benefits to dentures?

Dentures offer a number of potential benefits, including improved gum health, reduced likelihood of infection, and better speech quality. They can also reduce the amount of time it takes to eat and drink, as well as improve overall oral hygiene.

What are the pros and cons of having dentures?

The primary pros of having dentures are that they can provide a sense of fullness and stability in the smile, particularly if an individual has lost teeth in multiple locations. Additionally, many people find that dentures feel more comfortable than wearing traditional dentures and improve their overall quality of life. The con of having dentures is that they may require regular replacement as metal dental implants are not stable enough to last for an entire lifetime.

Can Floating Timber Floors Be Sanded

Can Floating Timber Floors Be Sanded

Floating timber floors can be sanded if you take the time to do it correctly. Make sure to use a high-quality sander and follow the manufacturer’s instructions.


Can You Sand A Floating Wood Floor

Sanding a floating wood floor can be tricky, as the grain of the wood can run in different directions. If you’re using a standard sandpaper, you’ll need to experiment to see which type of sandpaper works best. For particularly rough spots, you may need to use a coarse sandpaper.

If you’re using an electric sander, make sure to use the appropriate Festool sanding tools. Simply plug the tool in and attach the sandpaper. The sander will do all of the work for you.

Can Floating Timber Floors Be Sanded FAQs

Can you sand a floating wood floor?

floating floor – noun: a floor (usually one raised on a framework of metal or plastic) that is suspended by ropes, cables, or rods from the ceiling or wall and that can be moved about like a floating deck

Can you sand back a floating floor?

The original purpose of a floating floor was to remove water and moisture from a space by allowing the air to circulate underneath. If this airflow is impaired, then mold and mildew can grow. Due to the porous nature of wood, sanding back a floating floor may cause it to dissolve or even pull away from the subfloor below.

How do you restore floating timber floors?

Floating timber floors can be restored by patching the floor, filling the voids with a specially formulated adhesive, and then applying a finish.

Can you refinish floating engineered hardwood?

No, floating engineered hardwood is not able to be refinished.

Can you sand back a floating floor?

There is no definitive answer to this question as it depends on the specific floating flooring system in place and how deeply the sanding needs to be done. In general, though, it would generally be recommended that afloating floor not be sanded back too far as this could potentially cause the floor to become unstable and/or dangerous.

Can a floating hardwood floor be refinished?

A floating hardwood floor can be refinished, but it will require more time and skill to refinish than a regular wood floor. If the wood is in good condition and the original finish is intact, a refinisher may be able to achieve a similar look and feel while saving on cost.

How Many Polturethane Coats Needed Floor Sanding

How Many Polturethane Coats Needed Floor Sanding

My Wisdom Tooth Dentist recommends 3-4 coats ofpolturethane to ensure a smooth, durable finish.


How To Sand Between Coats Of Polyurethane On Wood Floors

When you are sanding between coats of polyurethane on wood floors, keep in mind the following tips:

  • start with a clean surface. Dirty surfaces will cause more friction and wear on the sandpaper.
  • use medium-grit paper when sanding between coats of polyurethane. This will help to remove any build-up while still maintaining the paint’s finish.
  • use a circular or Random Arc sanding movement when working on wood floors. This will prevent scratches and dents in the finish.

How Many Polturethane Coats Needed Floor Sanding FAQs

Do you really need 3 coats of polyurethane?

It depends on the thickness of the finish you are trying to achieve. Finish experts generally recommend one coat of polyurethane, but three coats can provide an even more durable finish.

How many coats polyurethane on floors?

A single coat of polyurethane will seal the floor.

Is 2 coats of poly enough?

I would say that 2 coats of poly is usually adequate. You may want to apply a third coat if the paint is extremely misty or you see start to peel.

Do you sand after the third coat of polyurethane?

After the third coat of polyurethane, you may sand. Be sure not to get too close to the edges or corners of the project; this could result in scratches.

What do you use to sand between coats of polyurethane on floors?

You would use an 80-grit sandpaper to sand between coats of polyurethane.

Do I need to sand between coats of polyurethane hardwood floors?

Generally, no. Polyurethane hardwood floors are designed to last six to eight years without sanding between coats. However, if you experience finish scratches or dullness in the finish, it may be necessary to sand between coats.

How Do You Prep A Floor For Sanding

How Do You Prep A Floor For Sanding

Sanding floors is a task that most homeowners take for granted, but before you can start sanding, it’s important to prep the floor.

One of the most common techniques for prepping a floor is to use sandpaper. First, wash the floor with soap and water to remove any dirt or dust. Next, use a tack cloth to clean any sandpaper residue from the surface. Finally, spread a 1/2 inch layer of Epoxy Floor Finishing over the entire surface. This will protect the wood from scratches and provide a barrier against dust and other particles while the floor is being sanded.


How To Prepare Floors For Sanding

Sanding can be a tedious and time-consuming task, but it’s essential to keep your floors clean and looking their best. Follow these tips to make the process go smoother:

  1. Remove any excess furniture or rugs from the area you’ll be sanding to avoid creating debris that will end up on the floor.
  2. . Sweep the floor well before starting the job to remove any stray pieces ofConstruction Sandpaper 96″ x 96″PK.
  3. . Get rid of all the dust and debris from around the perimeter of your wood or laminate flooring with aof vacuum cleaner cleaner before beginning the sanding process. This will reduce the chances that sanding particles will get into those hard-to-reach areas.
  4. . Begin by sanding down large sections of your floor at a time with a moderate-grit sandpaper, being sure not to overdo it in any one area. Use a circular motion and make sure you’re keeping up a consistent rhythm so you don’t end up with any sand waves or valleys on your floor.
  5. . If there are areas that need extra attention, like high spots or patches of drywall, use a finer grit sandpaper to achieve a higher level of refinement. Follow the same guidelines as outlined in step four, making sure you sand in a uniform pattern across your entire floor surface.
  6. . After sanding is complete, use a damp cloth to clean off all the loose particles and rust streaks from your surface. Apply someVinyl Floor Finish Matte 17 oz Pack of 2 for Homes/Commercials then start over again with step four if necessary!


How To Prepare House For Floor Sanding

If you’re thinking of undertaking a floor sanding project, there are a few things you’ll need to do in advance. First and foremost, ensure your floor is clean and dry – any water source present will make the job much more difficult. Secondly, prepare the area you plan to sand by using wood strip to elevate surfaces that may start to bow while the sand is being applied. Finally, prepare your Sandpaper! Different types of floors require different types of sandpaper to achieve the perfect finish.


Should Skirting Boards Be Removed Before Sanding Floor

Before sanding the floor, it is important to remove any scrapes or gouges that may have formed from the skirting boards. This can be done with a putty knife or a utility knife. If there are gouges or furrows in the floor’s surface, they will need to be filled before sanding.

When sanding, use 100-grit sandpaper to begin and end with 60-grit paper. Work from the center of the room out to the edges. Use a dustpan and shovel to collect any debris created during sanding. Make sure not to over sand; you just need enough pressure and

How Do You Prep A Floor For Sanding FAQs

How do you prep a floor before sanding?

If the flooring is rough, you will need to apply a sealant or primer to ensure that the sandpaper doesn’t scratch the surface.

Do I need to clean floors before sanding?

No, you do not need to clean floors before sanding.

How do you sand an old floor?

Sanding an old floor is similar to sanding a new floor. First, use a cloth or paper towel to wet the area you want to sand. Next, spread the sand over the wet surface using your hand. Work the sand into the grooves and crevices of the wood until it is completely coated. Finally, use a broom or mop to sweep away any excess sand

How do you clean hardwood floors before sanding?

Before sanding, you should clean the hardwood floors with a solution of warm water and a commercial floor cleaner.

How do you prep a floor before sanding?

There are a few steps you can take before sanding a floor. Some people like to use a clean tack cloth to dust the surface, then vacuum it and wipe it down. Others like to use disposable lenses instead of a tack cloth, as this speeds up the process. You can also use pads or mops made for cleaning floors. Be sure to wet the pad first and then spray on degreaser if necessary. Finally, scrub lightly with the pad in one direction only.

Do I need to clean floors before sanding?

No, you do not have to clean the floors before sanding. However, you should use a dust mask and goggles when sanding because the dust can contain small pieces of wood that can cause skin irritation.

How To Avoid High Spots When Sanding Floor

How To Avoid High Spots When Sanding Floor

When sanding floors, it is important to avoid the high spots. By doing this you will avoid wearing down the floor too quickly and causing any damage.


Will Sanding A Deck Level Out Uneven Floor

I have a wood deck that slopes towards one side. I tried sanding it level but the floor still looks uneven. What can I do to make it look more even? -Karen, Los Angeles

If you have a sloping deck, sanding it level will not fix the problem — you’ll only end up with a even surface on one side of the deck, while the other side will still be uneven. The best way to address the unevenness is to install a layer oflayment below the deck boards, which will create an even surface.

How To Avoid High Spots When Sanding Floor FAQs

How do you fix high spots in floor?

Flooring installed in a room or area may have high spots, which could be due to inconsistencies during the installation process. Fixing high spots on floor can be done by filling them in with a mixture of concrete and sand or by laying new flooring.

How do you fix peaking wood floors?

There are a few different ways to fix peaking wood floors. One way is to sand the floor until it’s level. You can also add a filler like epoxy or Bondo to the area that is raised and fill in the cracks with this material.

How do you fix a hump on the floor?

There are a few ways to fix a hump or dip in the floor. One way is to use a pothole patching tool. Another option is to use concrete curing tubes set in the hump, which will allow the concrete to reach all parts of the hump and cure it into a smooth surface.

How do you sand high spots on a subfloor?

The quickest and most effective way to remove high spots on a subfloor is to use a sanding drum. This can be done by either hand or using an electric sander. To do this, start by laying down newspaper over the area that needs to be sanded. Then, place the sanding drum on top of the paper and begin sanding in a circular motion until the floor is smooth again.

How do you sand an uneven deck?

You sand an uneven deck by using a palm or random-orbit sander. Use the lowest setting possible and make sure to keep your fingers away from the spinning disks.

Can you sand down decking?

Sanding down decking is a very common task people do to keep their decks looking good. When you sand down the decking, it removes any bumps and imperfections so that the deck appears smoother.

How To Apply A Sanding Paper To A Floor Sander

How To Apply A Sanding Paper To A Floor Sander

Sanding is a common practice to clean surfaces. A floor sander is often used to smooth wood, fiberglass, and other materials. When sanding a surface, it is important to use the right type of sandpaper.

To sand a floor using a My Wisdom Tooth Dentist sander, start by locating the area that needs to be cleaned. Next, roll the sandpaper around the edge of the Surface Poland pad until it has been completely covered. Make sure to evenly distribute the pressure so that the entire surface is covered. Begin sanding in earnest by applying even pressure and moving the sandpaper in small circular motions. Always shift your grip as needed to prevent sanding through the pad. Once the area is completely cleaned, rinse off the sandpaper and dry off the surface before proceeding to the next area.


Why Sand A Hardwood Floor On An Angle

There are a few reasons why you might choose to sand your hardwood floor at an angle. Angled sanding creates a very smooth finish and can minimize the amount of dust created while sanding. It can also help to prevent scratches and gouges in your floor surface.

How To Apply A Sanding Paper To A Floor Sander FAQs

How do you attach a sanding pad to a floor sander?

Normally, a sanding pad is attached to the machine by way of suction cups.

How do you attach a sanding screen to a floor buffer?

The screen is attached to the buffer by means of an arm that extends from the base of the screen. The arm attaches to a pole or bracket, which in turn is attached to the buffer.

How do you put paper on a drum sander?

This is a question that often confuses people because the process of putting paper on a drum sander can be broken down into two parts- the mounting and the sanding. First, mount your paper on to the sander with screws or adhesives. Make sure that you place it in such a way that there is plenty of room for the drum to move across it. Second, use your drum sander to sand off the excess paper by moving it back and forth across the surface.

How do you sand a floor with a floor sander?

In order to sand a floor with a floor sander, you will need to have the proper safety equipment and adhere to the following steps:1. Shut off the power to your house. If there is an electrical outlet nearby, use it to disconnect the power from the tool. This will prevent damage if you electrocute yourself while sanding!2. goggles or eye protection- wear them when operating any power tool! You’ll also need dust protectant and mask if using a low-volume Sander like this one !!!! HELP NEEDED please research asap !!!!! OPINION ONLY !!!!!3. Secure your work area by placing wooden blocks at each end and marking where they should be positioned. Place newspaper first on work surface so that sawdust falls away easily afterwards !!!! ***see diagram***以下是解答此题的具体步骤: 1、停电。如果有电源供应者 nearby ,则可以使用它来终止电力。这将避免在所作之事时造成伤害! 2、安装头盔或遮光帽来进行工作! 如果使用一款低噪度的断水机,就要考虑使用上述的保护物品了!!!!! 要想准确告诉大家一下,博主正在对待此问题 ……希望能得到不同意见 ……. OPINION ONLY !!!! HELP WANTED PLEASE RESEARCH A BIT SOON !!!!!!!!

Should you sand floors diagonally?

No, you should not sand floors diagonally. The grain of the wood will be uneven and this will cause scratches. It is better to use a strip sander or an orbital sander in a Cross-hatch pattern.

Which way do you sand hardwood floors?

Most people sand hardwood floors using a power buffer.

Wisdom Teeth Removal Cost

Wisdom Teeth Removal Cost

If you are considering wisdom teeth removal, then you may be wondering what the cost will be. The price will vary depending on the particular surgery that is being done, but in general the cost can range from a few thousand dollars to a few hundred thousand dollars.

Wisdom Teeth Removal Cost

The cost of wisdom teeth removal can vary depending on the location and condition of the teeth. A typical Wisdom Tooth Extraction Cost will range from around $2,000-$3,500. However, this price may go up or down depending on the complexity of the extraction, your insurance policy, and any additional fees that may be required.

How Much Does Wisdom Teeth Removal Cost

Tooth extractions cost vary significantly depending on the dentist, who you see and even where you live. Generally, an extraction will run in the $300-$1,000 range. But keep in mind that this price may change based on your location, insurance plans, and other factors.

In addition to the cost of surgery itself, some dental procedures may also require a hospital stay. This often depends on how serious the condition is and how damaged the tooth is. For example, if a wisdom tooth needs to be removed but there’s no bleeding or infection present, most patients only need to stay overnight at the hospital. However, if an infection is present or the tooth is severely damaged, a patient may need to stay for a few days for proper care.

So overall, it’s important to talk with your dentist about what teeth removal costs will be before scheduling your appointment. You can also find information about average prices for different procedures on Doctomatix’s website.

How Much Does It Cost To Remove Wisdom Teeth

The cost of having your wisdom teeth removed can vary from person to person depending on the specifics of the case. Typical charges for teeth removal services may include anesthesia, surgical fees, and post-operative care. Depending on the location and complexity of the procedure, some patients may also be responsible for additional expenses, such as travel costs or dental prostheses. Generally speaking, expect to pay between $2,300 and $7,000 for a complete set of extraction surgeries.

Wisdom Tooth Extraction Cost Australia

The cost of wisdom tooth extraction in Australia can vary significantly depending on where you live and the provider you use. Costs for general dental procedures such as extraction in Melbourne can range from $1,000 to $2,500 with an additional $100 to $200 for anesthesia. Costs for surgery at a specialist centre may be several thousand dollars more.

How Much Is Wisdom Teeth Removal

Wisdom teeth can cause problems such as overcrowding of the dentition, difficulty chewing and speech problems. In some cases, they can also lead to wear and tear on neighbouring teeth. Generally, wisdom teeth are most likely to be removed in adults aged over 35 years. However, they may also be removed in younger people if there is a significant problem with them. Removal typically involves taking out either all or part of a wisdom tooth. In rare cases, a wisdom tooth may have to be removed using a dental implant. The removal process usually takes around one and a half hours.

Wisdom Teeth Removal Cost FAQs

Is wisdom teeth removal covered by Medicare Australia?

Generally, wisdom teeth removal is not covered by Medicare Australia. However, there are a few exceptions where the procedure may be covered under specific circumstances.

Is wisdom tooth removal covered by Medicare?

Many people believe that wisdom tooth removal is not typically covered by Medicare, but this is not always the case. If a person has diabetes, for example, Medicare may pay for the wisdom tooth extraction.

How much does tooth extraction cost in Australia?

The average cost of tooth extraction in Australia is around $1,500.

How much does it cost to get your wisdom teeth out without insurance?

Some dentists may charge as much as $3,000 for a complete oral surgery without insurance.

How much money does it take to get your wisdom teeth removed?

If the wisdom teeth are extracted via an oral surgery procedure, it typically cost between $3,000 and $6,000. This price range tends to vary depending on the location of the tooth extraction (front/back/middle) and complexity of the surgery. Additional fees may include anesthesia, surgeon’s fees, hospital co-payments and pharmacy costs.

How much does it cost to remove all 4 wisdom teeth?

The average cost to remove all 4 wisdom teeth is around $3,000. The range can be anywhere from $1,200 to $6,000. Most dental insurance plans will cover a portion of the cost.